


Instead of using an additional PROSHIELD visor to adjust to light conditions, simply press the toggle lever to deploy the tinted DROPSHIELD sun visor hidden in the helmet. Tinted DROPSHIELDS should not be used in low light; in poor light, switch to a yellow lens or simply use a clear ICON PROSHIELD visor instead of the tinted one. The tinted DROPSHIELD sun visor is recommended for use with the helmet’s main clear visor closed.
The recommendation to replace your helmet every five years is based on the consensus of all helmet manufacturers, and the same recommendation applies to all Icon® helmets. Glues of various compositions, rubber parts and other materials used in helmet production can affect the structure of the liner materials over time. Oil from the sebaceous glands of the scalp, sweat, hair products, and ordinary wear and tear also “contribute” over time to the deterioration of the materials the helmet is made of. In addition, petroleum-based ingredients in cleaners, paints and polishes, and constant exposure to gasoline fumes sooner or later have a destructive effect, invisible to the eye, on the helmet materials, which can impair its performance. Practical experience shows that the standards helmet manufacturers follow are revised every five years. This, combined with new advances in material composition, design and manufacturing technologies, naturally leads to the conclusion that it is in the rider’s interest to replace the helmet every five years.
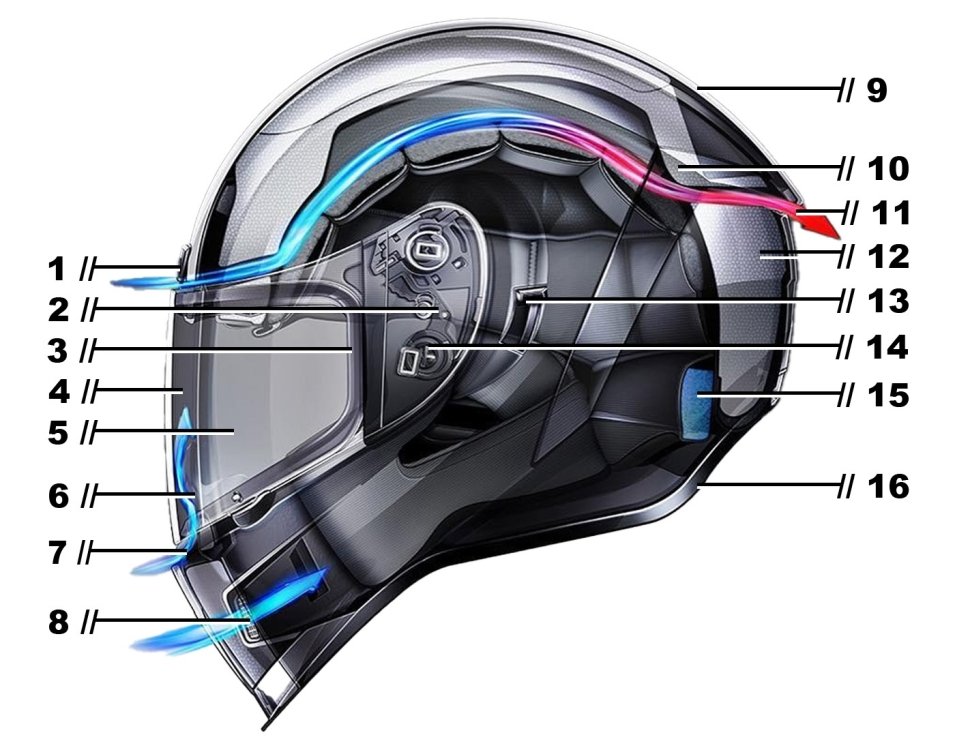
The ICON® AIRFORM™ helmet meets the safety standards DOT FMVSS 218 (USA), ECE 22.05 (EUROPE), SAI AS1698:2006 (AUSTRALIA) and PSC (JAPAN). These head protection standards are recognized by 50 countries. Before attempting to repair or replace parts on the helmet, refer to the diagram below to familiarize yourself with the specific names and terms used to describe the AIRFORM™ helmet.
DO NOT MODIFY THE HELMET. To keep this helmet effective, its construction and components must not be altered. Paints and adhesives can damage the helmet without the user noticing and reduce its effectiveness.
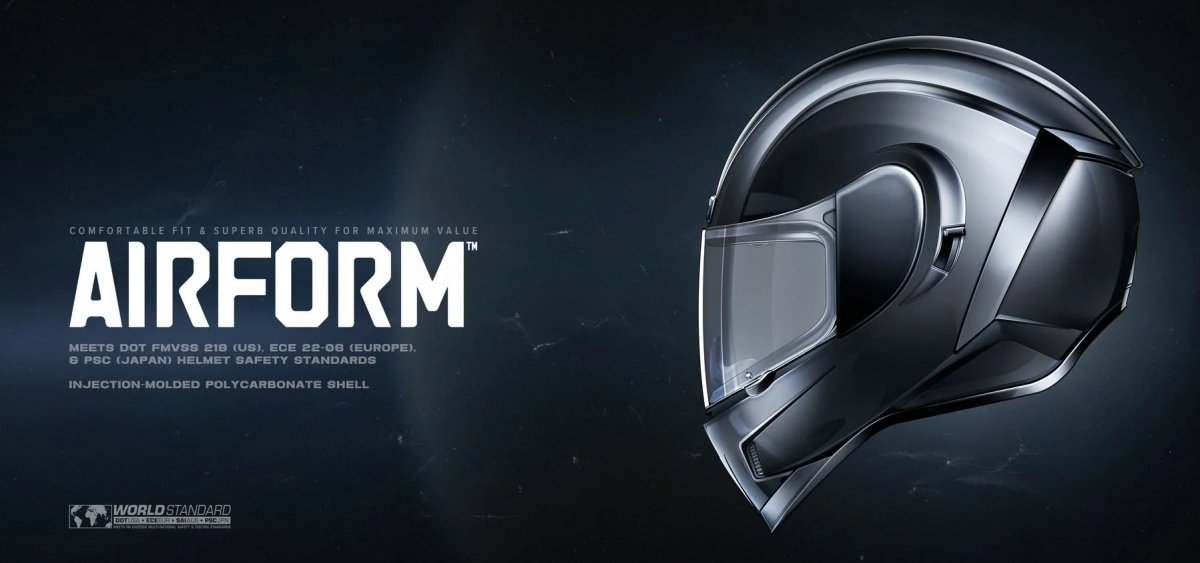
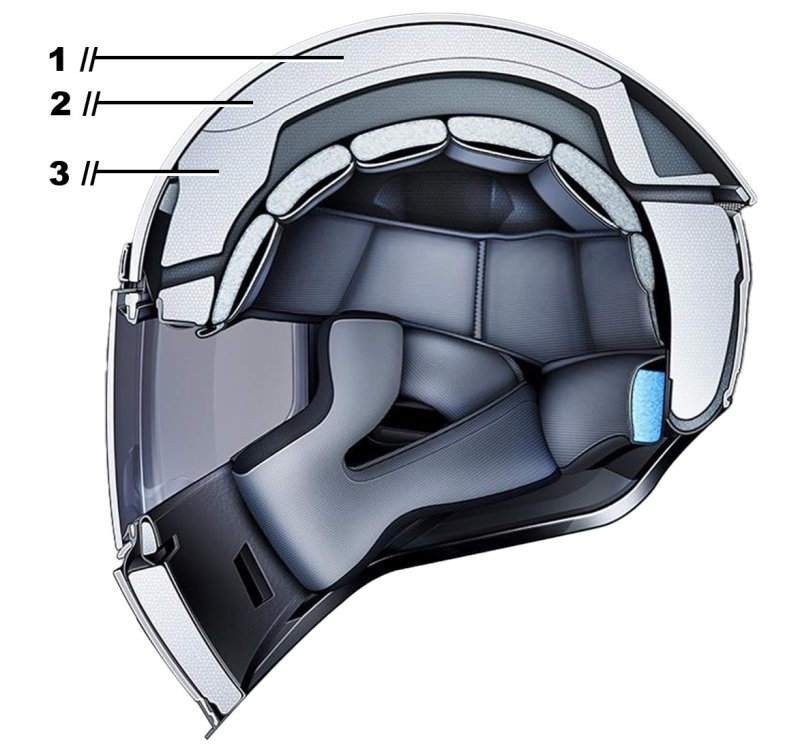
The ICON® AIRFORM PC-ABS helmet shell was created to the strictest quality standards on the market today using polycarbonate extrusion-compression molding. The ICON® AIRFORM dual-density expanded polystyrene liners are designed for maximum absorption and dissipation of impact force. In addition, both liners have a series of directed air channels to distribute airflow from the external ventilation system.
No helmet can protect against all possible injuries. For your safety, choose a helmet that fits you correctly. For maximum head protection, the helmet must fit snugly and be securely fastened under the chin.

To ensure a proper fit, follow these instructions:
For the helmet to work properly, the chin strap must always be fastened when worn. With the chin strap fastened, the helmet must not come off when pulled from the center of the back. Periodically check the chin strap to make sure vibration has not loosened it. To check, simply pull on it a little.

To securely fasten the D-ring retention system, thread the end of the chin strap through the D-rings exactly as shown in the figure below. Fasten the snap on the chin strap to secure the loose end of the strap once it is securely tightened. The only function of the snap at the end of the chin strap is to keep it from flapping in the airflow. It is not part of the retention system. It should be used separately to secure the loose end of the strap.
To unfasten the D-ring retention system, release the loose end of the chin strap from the snap. Then pull the red tab at the end of the lower D-ring to loosen the chin strap. After that, pull the end of the chin strap back through the D-rings to release it completely.
MAKE SURE THE CHIN STRAP IS FASTENED ACCORDING TO THE INSTRUCTIONS ABOVE. MISHANDLING THE STRAP MAY RESULT IN SERIOUS INJURY OR DEATH.
Safe use warning: Do not rely on the chin strap snap alone. It only serves to keep the loose end of the strap out of the way while riding. Fasten the retention system only as shown in the image.
SAFETY WARNING: to reduce the risk of serious injury or death, always use the helmet correctly.

This helmet is not suitable for use with glasses.
SAFE USE WARNING: Do not ride without the side plates attached. If the visor is opened while riding without the side plates, the force of the air acting on the open visor may tear it off the helmet.


SAFE USE WARNING: Incorrect installation of the internal visor may affect its operation.
To remove the interior parts for cleaning or replacement:

To open the forehead vents, slide the switches in the slots up.

ONE-IMPACT RULE — AFTER ANY SEVERE IMPACT, THE HELMET MUST BE REPLACED. Helmets are designed to protect against one impact only. The helmet is designed so that the head is protected in an impact through damage to the shell and EPS liner. In any hard impact on the helmet, the area of the liner that takes the impact absorbs and dissipates the force, which compresses it and damages the liner. The damage may not be visible. Even if no VISIBLE damage is found on the shell, the helmet will be unfit for use after one impact. After an impact, replace the helmet with a new one and dispose of the old one, even if it appears undamaged.
HEARING: wearing any helmet reduces a person’s ability to hear. A person who uses a helmet should be aware that their ability to hear the surrounding world is reduced. Not knowing that hearing is reduced when wearing a helmet may lead to an accident that can cause injury or death.
A helmet has a limited service life and must be replaced when typical signs of wear appear, such as changes in shape, cracks, corrosion, abrasion or other signs of material wear that could lead to helmet damage.
The advice to replace your helmet every five years is based on the consensus of most helmet manufacturers. Glues, resins and other materials used in helmet production can affect the liner material over time. Skin oils, sweat and cosmetics, as well as normal wear of the materials, also lead to deterioration of the helmet liner. In addition, petroleum-based products in cleaners, paints, fuel and other commonly used substances can damage the materials used in helmet production, potentially impairing their performance. Experience shows that motorcycle helmet quality standards are revised every five years. Combined with statistics on improvements in materials, design and manufacturing methods, this leads to the conclusion that it is in the owner’s interest to replace their helmet at least every five years. After buying a new helmet, dispose of the old one so that it is not reused. Do not sell or give away your old helmet, even if it is undamaged. Over time, the protective layer in a helmet takes the shape of the rider’s head. Such a helmet cannot provide another rider with a comparable level of protection.
No personal protective equipment can protect against all types of injuries in a crash or fall from a motorcycle. No riding gear can provide complete protection against impacts or abrasion in a crash or fall from a motorcycle. Motorcycling is inherently dangerous, and using this helmet cannot prevent injury or death. Even at low speed, a crash can result in serious injury or death. By using this helmet, the user assumes all risks associated with this activity that may result in injury or death. The user hereby waives all claims and lawsuits against Icon® Motosports, Lemans Corporation and J-TECH Corp in the event of death or injury resulting from the use of Icon Motosports products.


